Most water skis, whether combo skis or slalom skis, come with pre-drilled holes for installing bindings. But in rare cases, you may need to install your own ski bindings from scratch. You might have to drill new holes to mount your boots or plates. Maybe you're just a new skier, and you're curious about how bindings mount to water skis. Let's take a look.
How to Mount Water Ski Bindings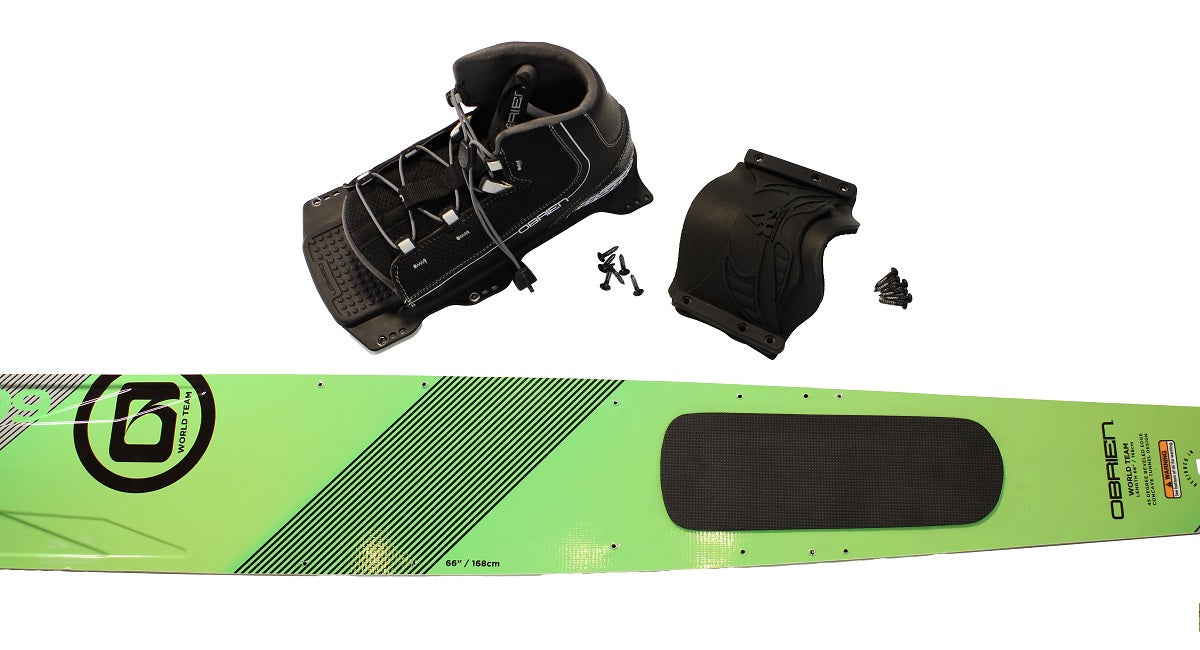
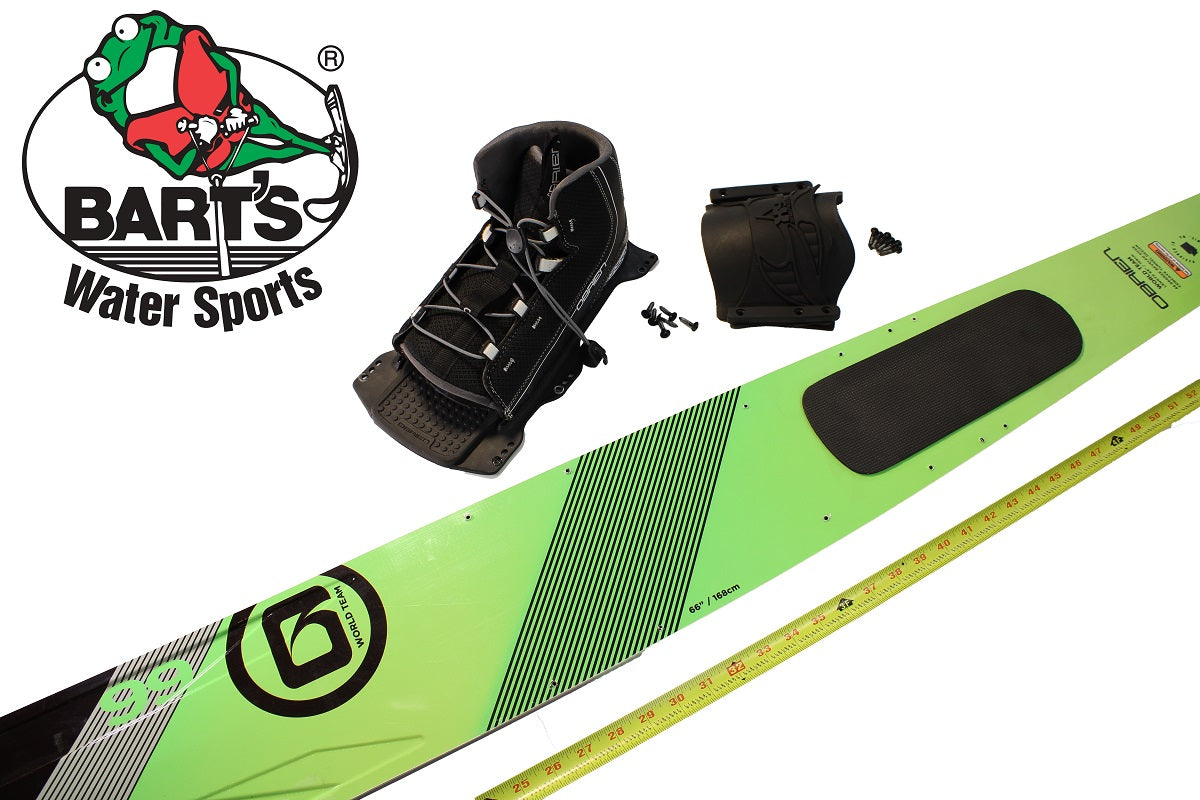
Pictured: O'Brien Pro Tour Slalom Ski
Regardless of the brand of ski, virtually all water ski bindings use two types of fasteners: Self-tapping, coarse-thread screws -- like the O'Brien Pro Tour, above -- or buttonhead screws that secure to threaded inserts (often called "nutserts") installed in pre-drilled holes in the ski.
Pictured: Radar Pro Build Vapor Slalom Ski
Self-tappers are typically found on more affordable and entry-level skis made from layered fiberglass. Higher-end skis made from carbon fiber and composites (like the Radar Vapor) usually require threaded inserts be used instead.
Installing Pre-Drilled Ski Bindings
If you're installing bindings onto a pre-drilled ski, it's easy: Simply align the front and rear bindings with their mounting holes, and secure each with the provided fasteners.
Centering Your Front Binding
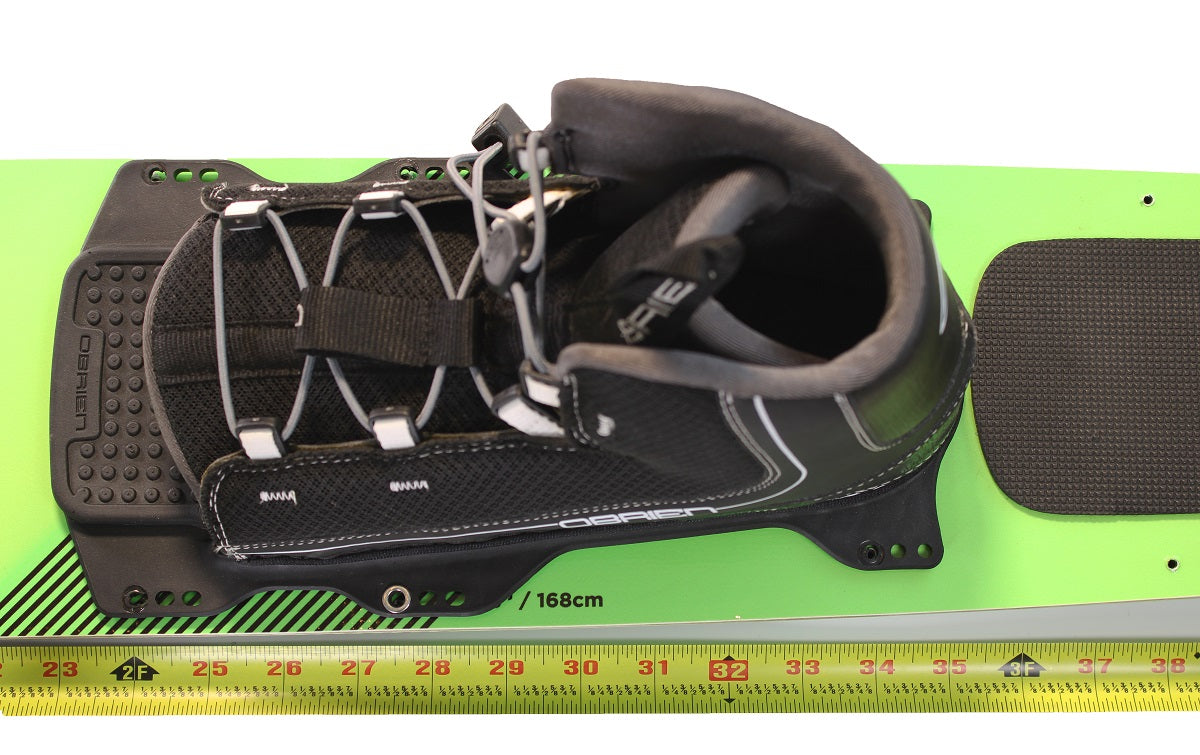
Some bindings (like the Z9 front boot, pictured above) have adjustable plates, allowing you to shift the placement of the binding toward the front or rear of the ski. If you're setting up a new ski, it's best to center the binding so the back half of the rider's front foot is resting atop the center of the ski.
For example, this O'Brien Pro Tour Ski measures 66" in length. So, we've centered the front binding so the back half of the rider's front foot rests between 30" and 34" down the length of the ski.
Optimal Spacing Between Ski Bindings
Most skis' rear bindings are also pre-drilled, so the spacing between the front and rear bindings is predetermined.
But if you have the option of adjusting the distance between the front and rear binding, the consensus is simple: The closer together your front and rear feet are, the more stable you'll be atop your ski, and the more control you'll have when riding.
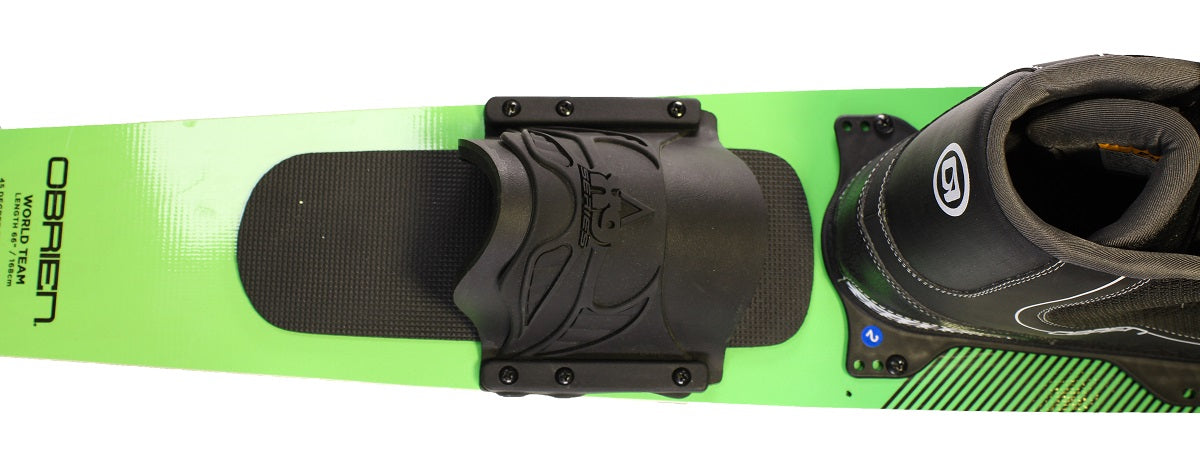
Most pre-drilled water skis leave little to no distance between the rear and front bindings. On this O'Brien Pro Tour, we can see how the footbed of the rear toe plate is practically touching the backside of the front boot.
If you're mounting your own rear binding with no pre-drilled holes, a good rule of thumb is to leave a 1/16" to 1/2" gap between the toe box of the rear binding, and the heel of the front binding.
Regardless of the bindings in question, this setup will result in an ankle-to-ankle distance between 10" and 13" (depending on your shoe size). Most experienced and pro water skiers say this is the ideal distance between the front and rear feet.
Drilling New Mounting Holes
If you need to drill new binding mounting holes on your water skis, it's critically important you properly center and square the front binding, first.
It's again best to mount the front binding atop the ski so the half back of the rider's foot is centered on the ski. Use a measuring tape to verify placement.
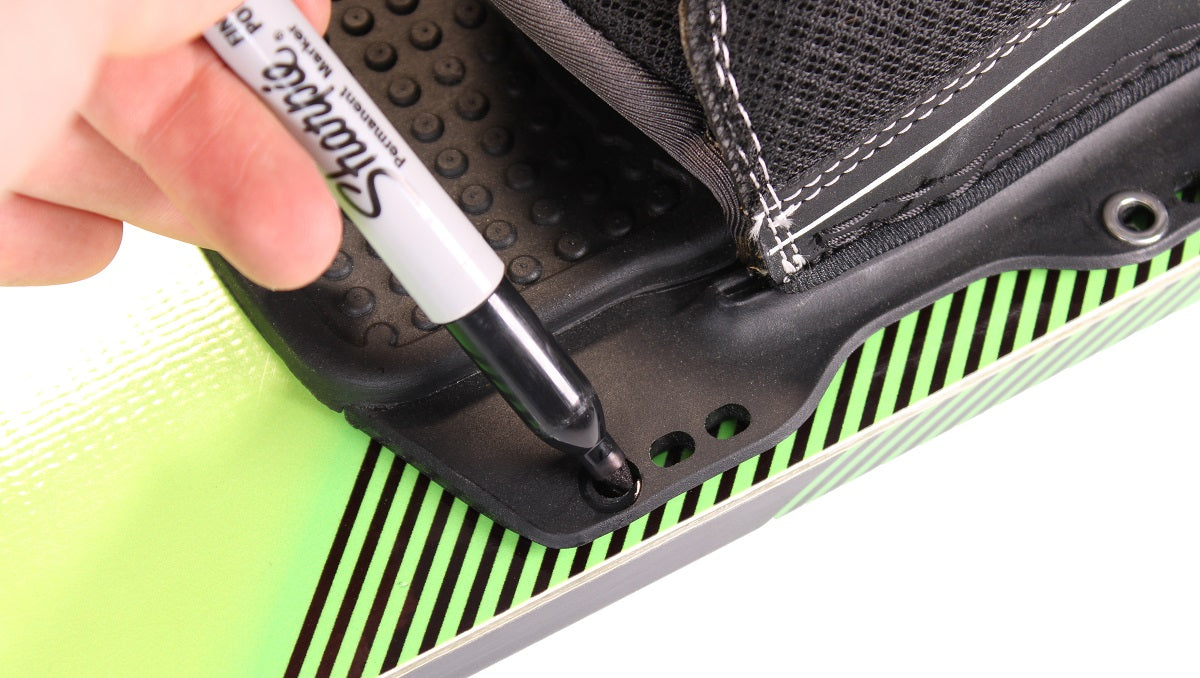
Using a marker, mark the locations for installing the front binding's hardware.

If your ski's bindings use self-tapping screws, first drill pilot holes into the top of the ski using a drill bit slightly smaller than the diameter of the mounting hardware.

When drilling pilot holes for the binding hardware, take care to ensure you don't drill more than the depth of the screws, or no further than half the thickness of the ski -- default to whichever depth is shorter.
Once the front binding is installed, repeat the process for the rear binding, ensuring the rear binding is centered on the ski and that the distance between the front and rear bindings is minimal -- 1/16" to 1/2" -- with an ankle-to-ankle distance between 10" and 13".
Consult Ski Maker if Installing Nut Inserts
If you have to drill new fastener mounts on a carbon or composite ski that uses pre-drilled inserts, you should consult with the ski maker before drilling the ski.
It's important to drill the mounting holes for the bindings' nut inserts with the correct drill bit, to the correct depth. You will also need to secure the nut inserts in the holes using epoxy resin. The ski maker can provide assistance with this information.
Wear Safety Equipment When Drilling
When drilling fiberglass, carbon fiber, or other composite materials, you should always wear a respirator and safety goggles. Inhaling the fine dust created by drilling into these ski materials is dangerous; these materials are carcinogenic and could cause lung injuries.